|
|
|

|
|
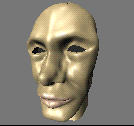 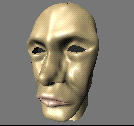 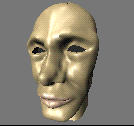 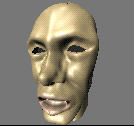 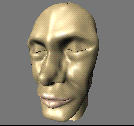 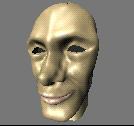 Face by Jason Nairn |
The Complete Blender pages
Relative VertexKeys Relative VertexKeys are best explained by example. Here is a simple Blender file showing an example of relative keys with three key positions (smiling and left/right eyebrow movement) and an animation showing the blending of them. Relative VertexKeys simplify the creation of facial and character animation by blending sets of VertexKeys. While traditional vertex keys are controlled with only one interpolation curve, relative vertex keys are controlled by one interpolation curve for every key position, thus relative keys can be mixed (added, subtracted, etc.). For facial animation the base position might be a relaxed position with a slightly open mouth and eyelids half open. Then keys would be defined for left/right eyeblink, happy, sad, smiling, frowning, etc. The trick with relative vertex keys is that only the vertices which are changed between the base and the key affect the final output during blending. This means it is possible to have several keys affecting the object in different places all at the same time. For example, a face with three keys: smile, and left/right eyeblink could be animated to smile, then blink left eye, then blink right eye, then open both eyes and stop smiling - all by blending 3 keys. Without relative vertex keys 6 vertex keys would have needed to be generated, one for each target position. The Relative VertexKey buttons  The "Relative Keys" button toggles the VertexKey system for the selected object between traditional and relative mode. It only becomes active after the first ('base') key has been inserted.  Relative keys are defined by inserting normal vertex keys (see manual pages 123-126). The vertical order of the vertex key determines its corresponding IPO curve, ie. the lowest blue key line will be controlled by the "Key1" curve, the second lowest will be controlled by the "Key2" curve, and so on. The "Relative Keys" button in the AnimButtons must be active for the Key curves to be displayed. When "Relative Keys" is active the speed curve no longer affects the mesh position and can be removed.  The blending between relative keys is controlled by the IPO Curve for each key. These curves should be created in the typical fashion (see manual page 118, "Draw IPOCurves"). The final position is determined by adding all of the affects of each individual IPO curve. An important part of relative keys is the use of additive or extrapolated positions. For example, if the base position for a face is with a straight mouth, and a key is defined for a smile, then it is possible that the negative application of that key will result in a frown. Likewise, extending the IPO Curve above 1.0 will "extrapolate" that key, making an extreme smile. An excellent example of this can be found here. The model has only 6 targets, but a complete range of facial expression. The technique can also be seen in the demo file where the negative and extrapolated curves are used to expand the range of motion. |


